Compostional Layout을 조금 더 잘 활용하고 싶어서 학습자료를 찾던 중
Apple Sample Code에서 너무 좋은 레퍼런스를 찾아서 이를 하나씩 정리해본 자료입니다. 🙃
Compositional Layout?
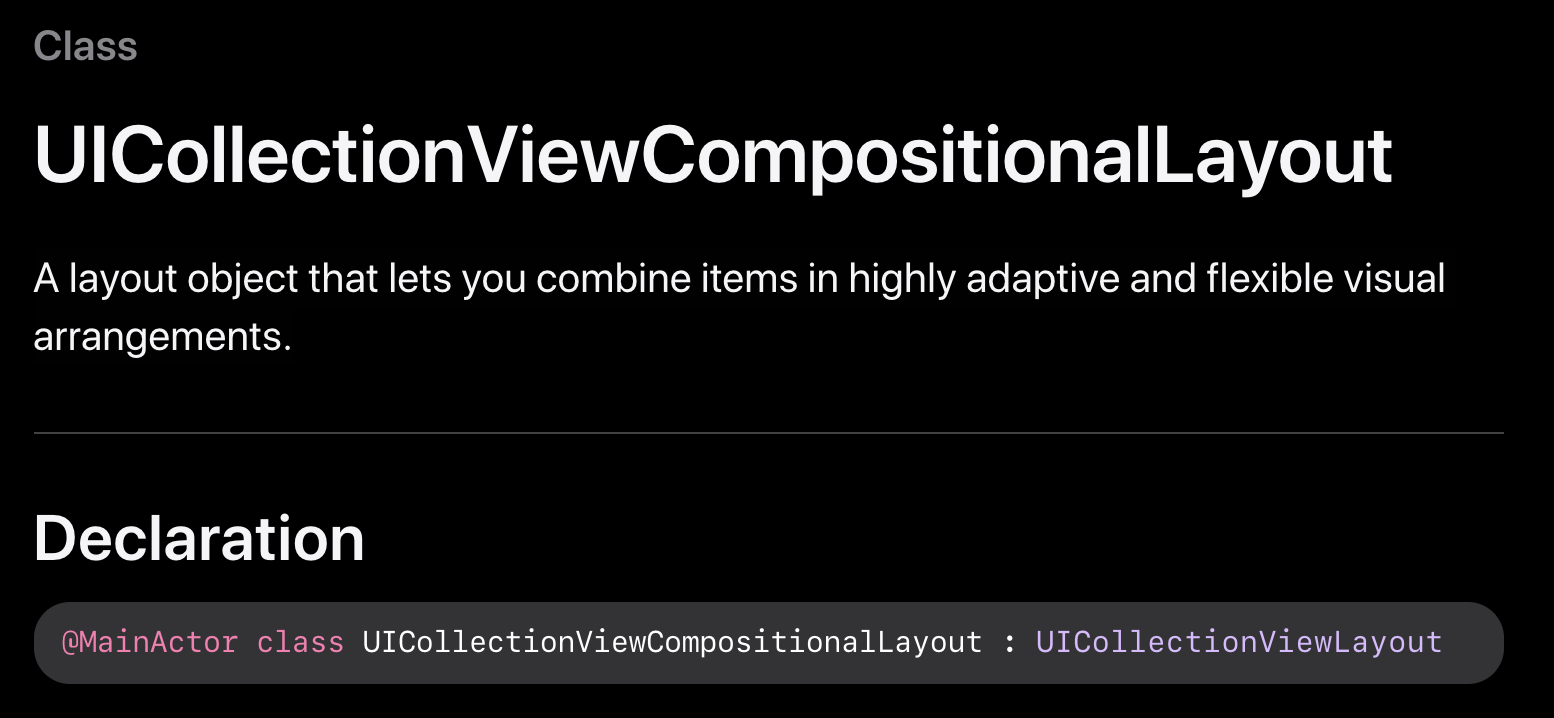
Compositional Layout은 유연한 시각적 배열로 아이템들을 결합할 수 있는 레이아웃 객체이다.
이는 CollectionViewLayout의 한 타입인데, 작은 구성요소를 전체 레이아웃으로 결합하여 컨텐츠에 대한 시각적 배열을 구축할 수 있다.
Compositional layout은 시각적으로 뚜렷한 그룹으로 나뉘는 하나 이상의 Section으로 구성된다. 각 Section은 표시하려는 가장 작은 데이터 단위인 Item으로 구성된다. Group은 항목을 수평, 수직 또는 커스텀 배열로 배치할 수 있다.
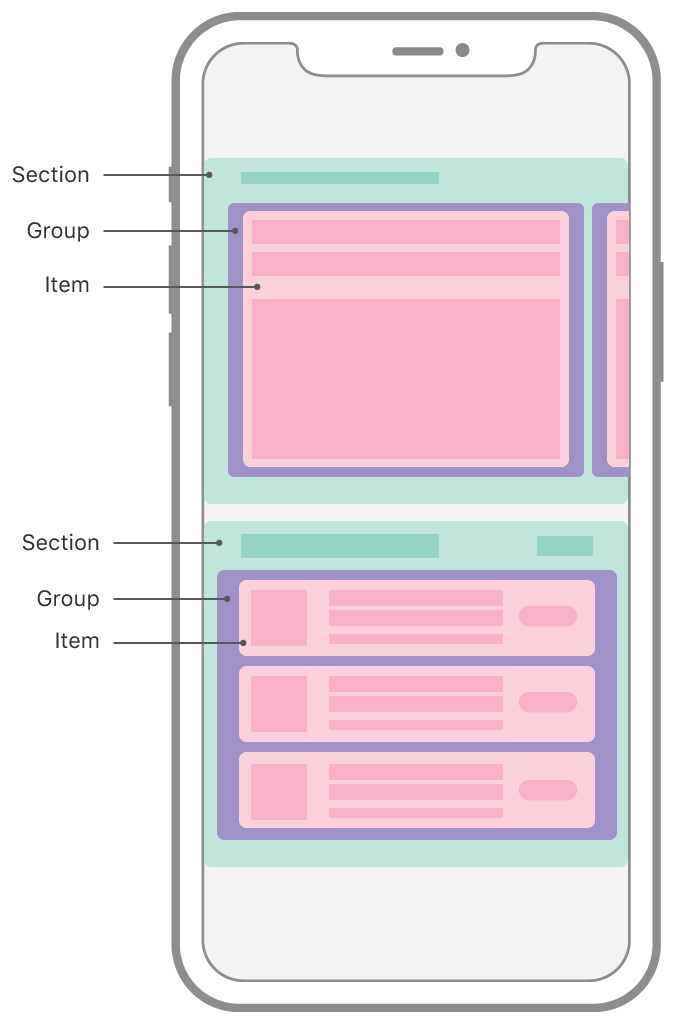
즉, Item들을 묶어서 Group으로, Group들을 묶어서 Section으로 만드는 방식으로 전체 레이아웃을 구성할 수 있는 것이다.
Grid Layout
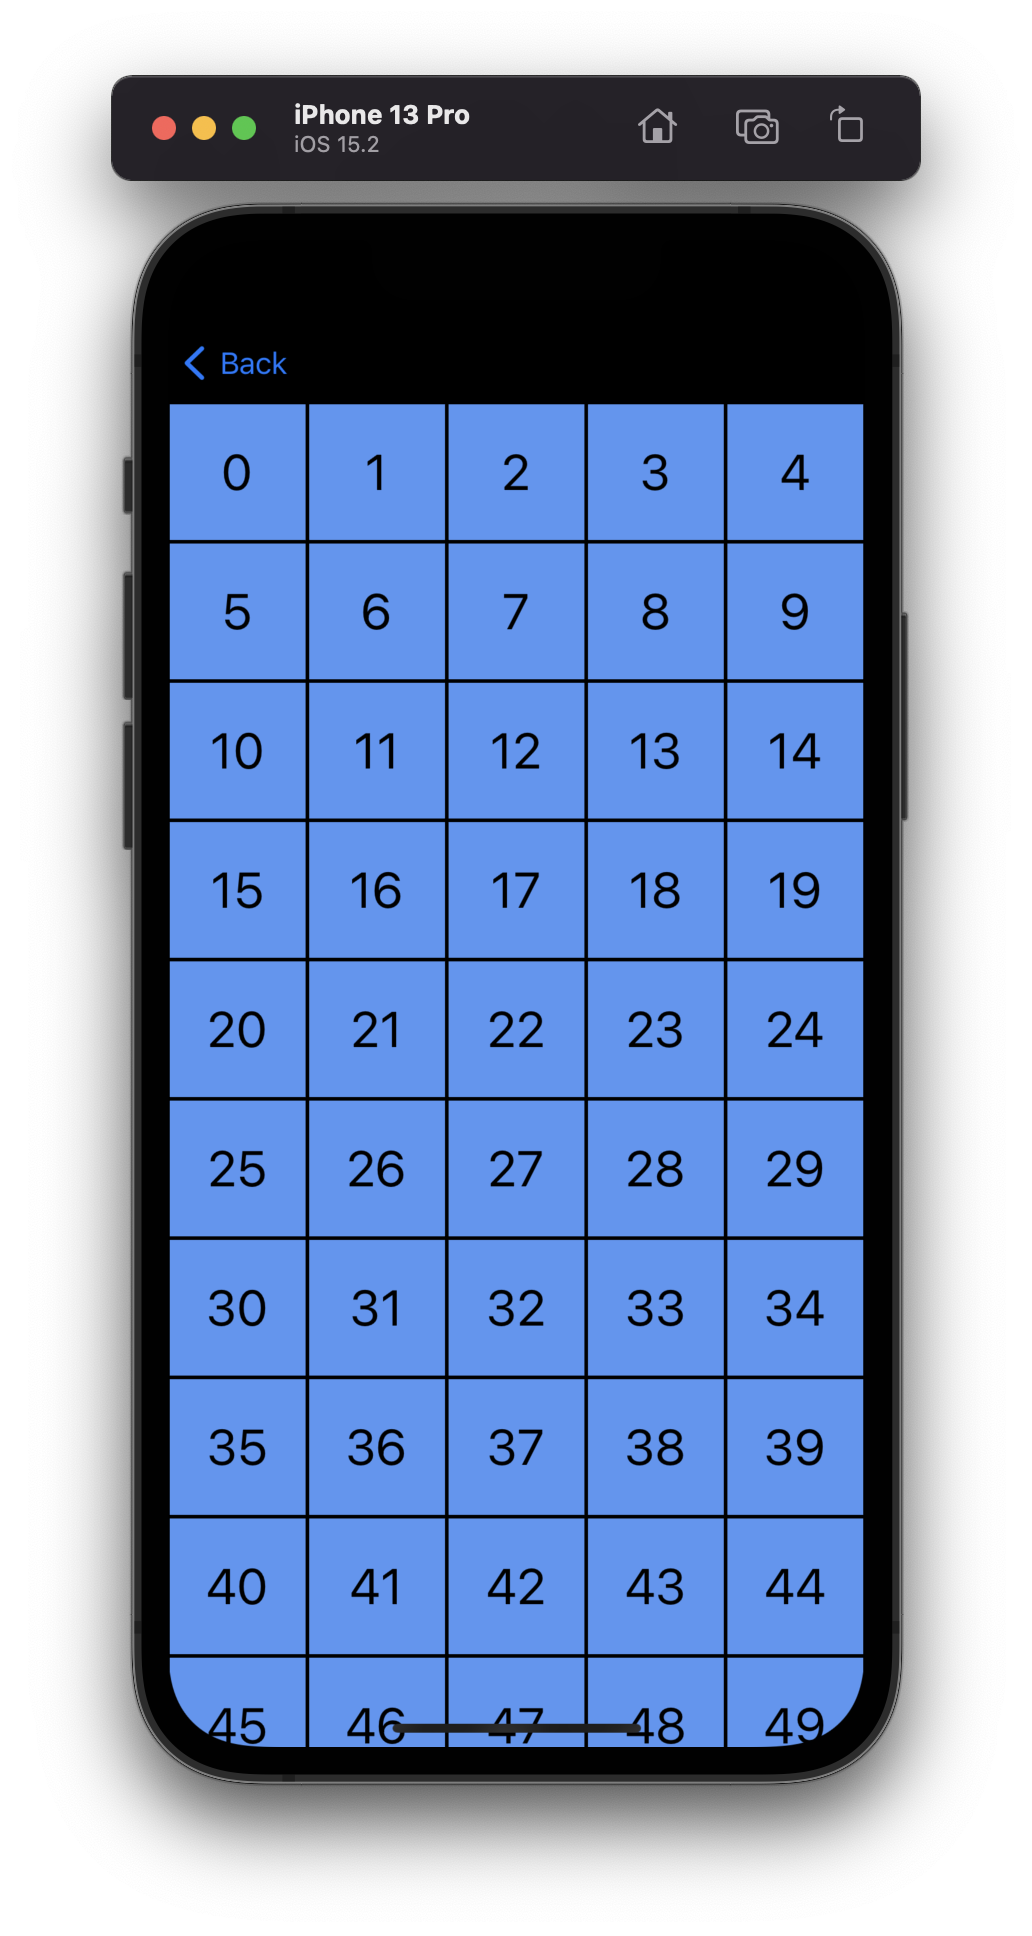
let itemSize = NSCollectionLayoutSize(widthDimension: .fractionalWidth(0.2),
                                     heightDimension: .fractionalHeight(1.0))
let item = NSCollectionLayoutItem(layoutSize: itemSize)

let groupSize = NSCollectionLayoutSize(widthDimension: .fractionalWidth(1.0),
                                      heightDimension: .fractionalWidth(0.2))
let group = NSCollectionLayoutGroup.horizontal(layoutSize: groupSize,
                                                 subitems: [item])

let section = NSCollectionLayoutSection(group: group)

let layout = UICollectionViewCompositionalLayout(section: section)
return layout
해당 예제는 franctional sizing을 통해 5개의 item을 같은 크기로 배치하고 있다. 이는 각 item이 20%의 width를 가지는 horizontal group을 생성한다. (by .fractionalWidth(0.2)) 5개의 item을 가지는 각 Row들은 하나의 section에서 여러번 반복되고 있다.
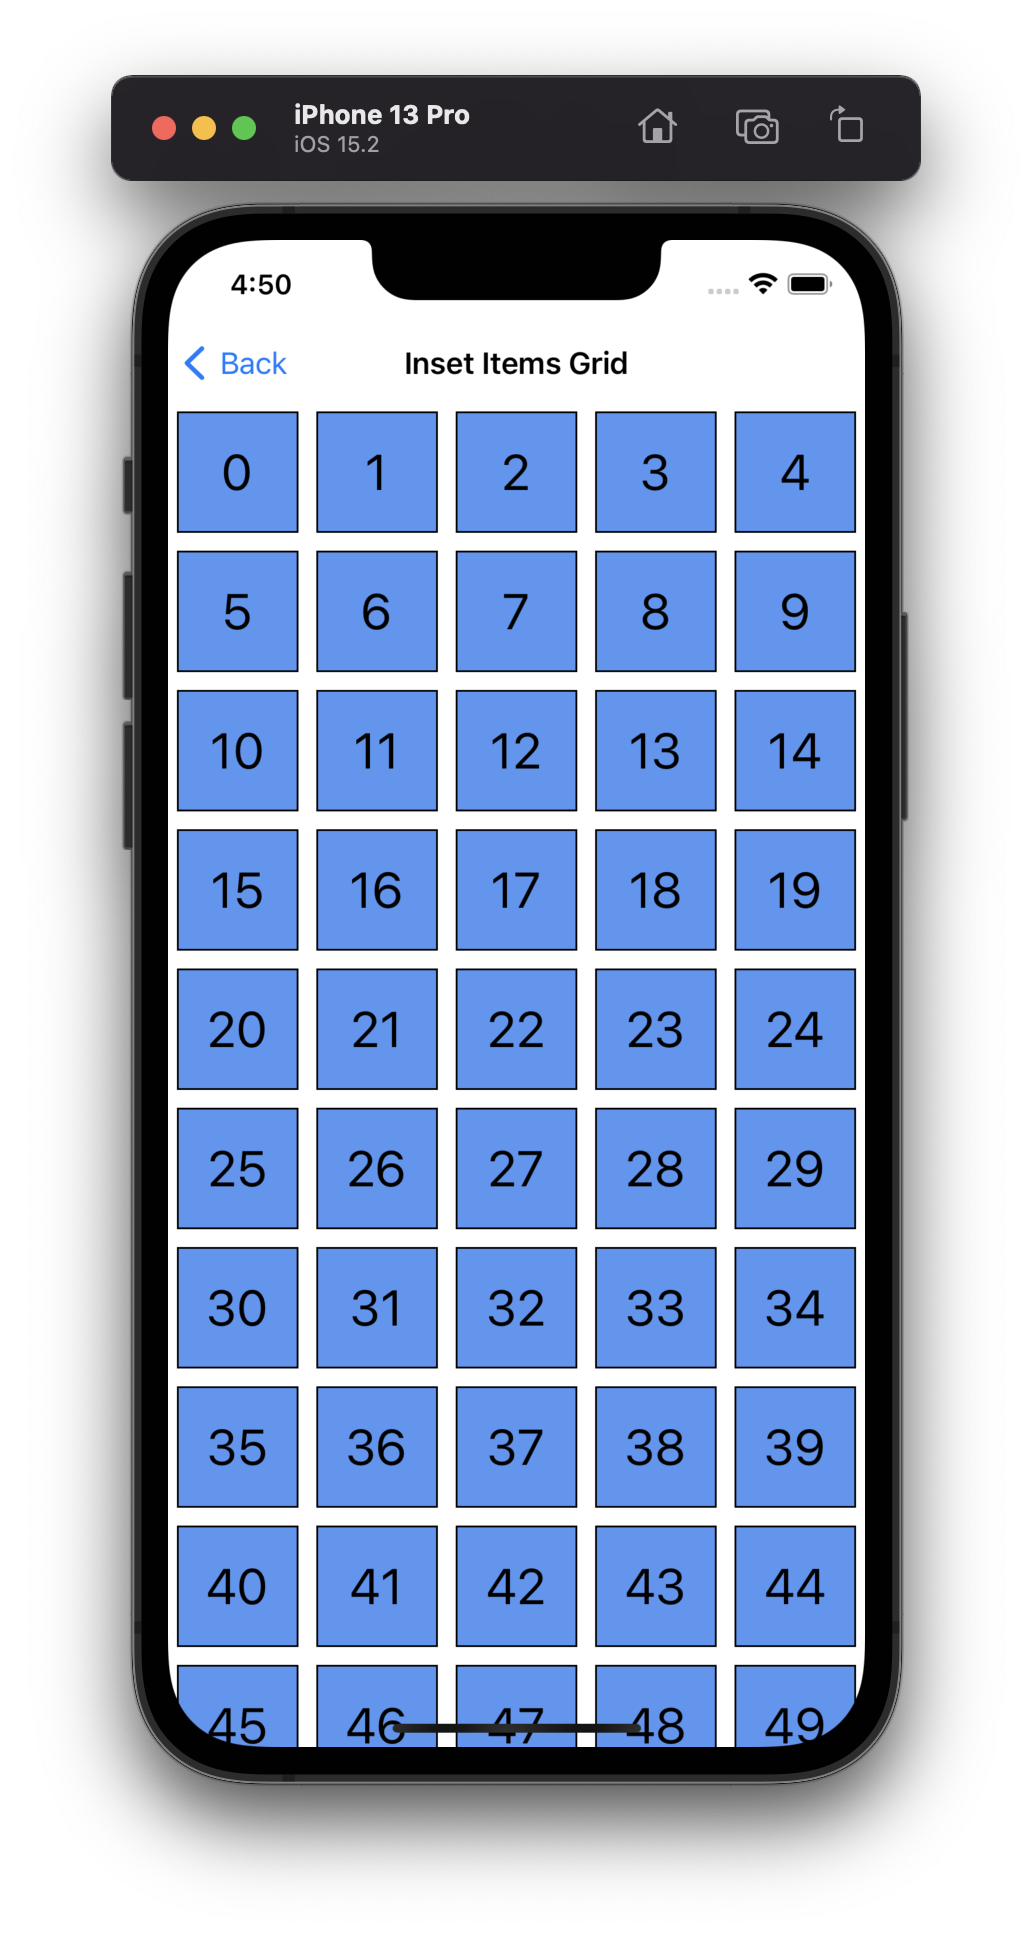
Add Spacting Around Item
item.contentInsets = NSDirectionalEdgeInsets(top: 5, leading: 5, bottom: 5, trailing: 5)item에 contentInsets 속성만 추가해주면 각 item간의 간격이 생긴다.
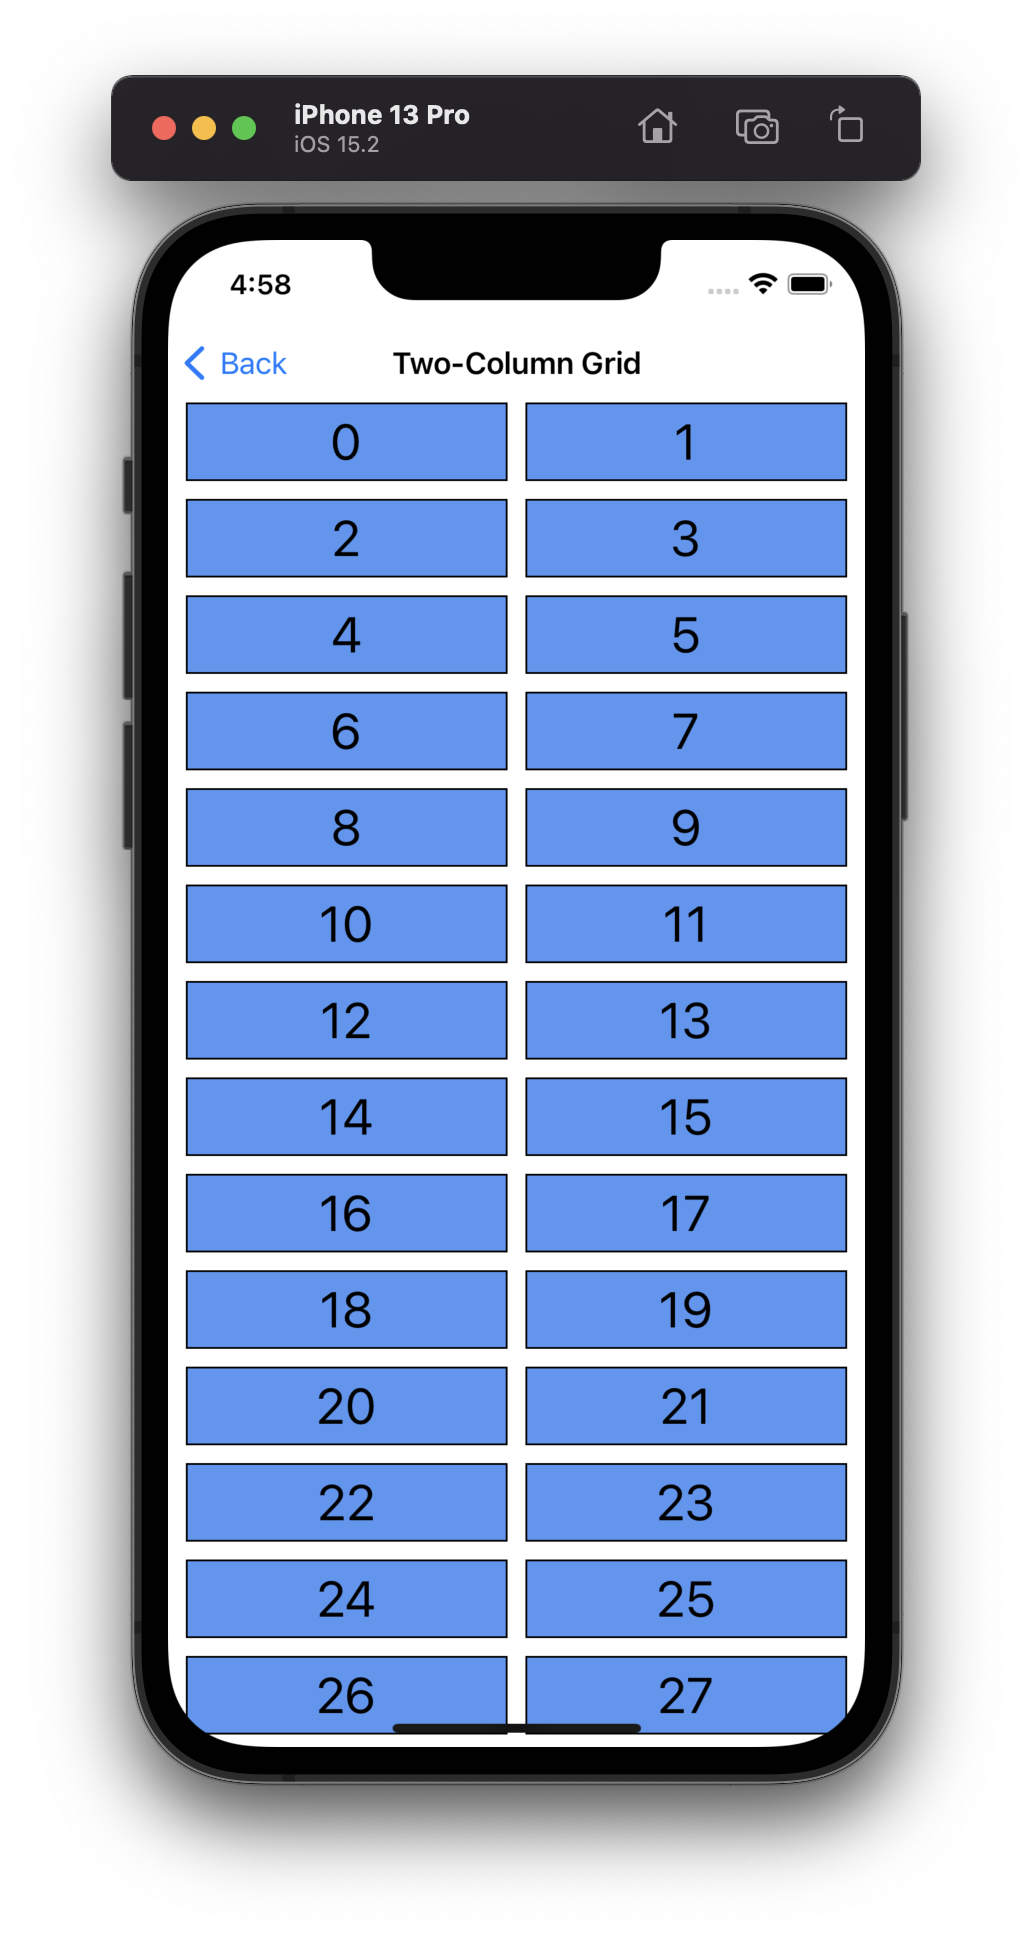
Create a Column Layout
let itemSize = NSCollectionLayoutSize(widthDimension: .fractionalWidth(1.0),
                                     heightDimension: .fractionalHeight(1.0))
let item = NSCollectionLayoutItem(layoutSize: itemSize)

let groupSize = NSCollectionLayoutSize(widthDimension: .fractionalWidth(1.0),
                                      heightDimension: .absolute(44))
let group = NSCollectionLayoutGroup.horizontal(layoutSize: groupSize, subitem: item, count: 2)
let spacing = CGFloat(10)
group.interItemSpacing = .fixed(spacing)
해당 예제는 group의 item 개수를 지정해서 2개의 행을 가지는 Grid를 생성한다. 이 때 아이템 개수 지정은 horizontal(layoutSize:subitem:count:) 메서드를 통해서 구행한다. count에 개수를 적어주는 것이다. 이렇게하면 정확하게 하나의 group에 존재할 item 개수를 지정할 수 있다. 이 경우 count 파라미터가 itemSize보다 우선시되어 각 item의 크기는 항목 수에 맞도록 자동계산된다.
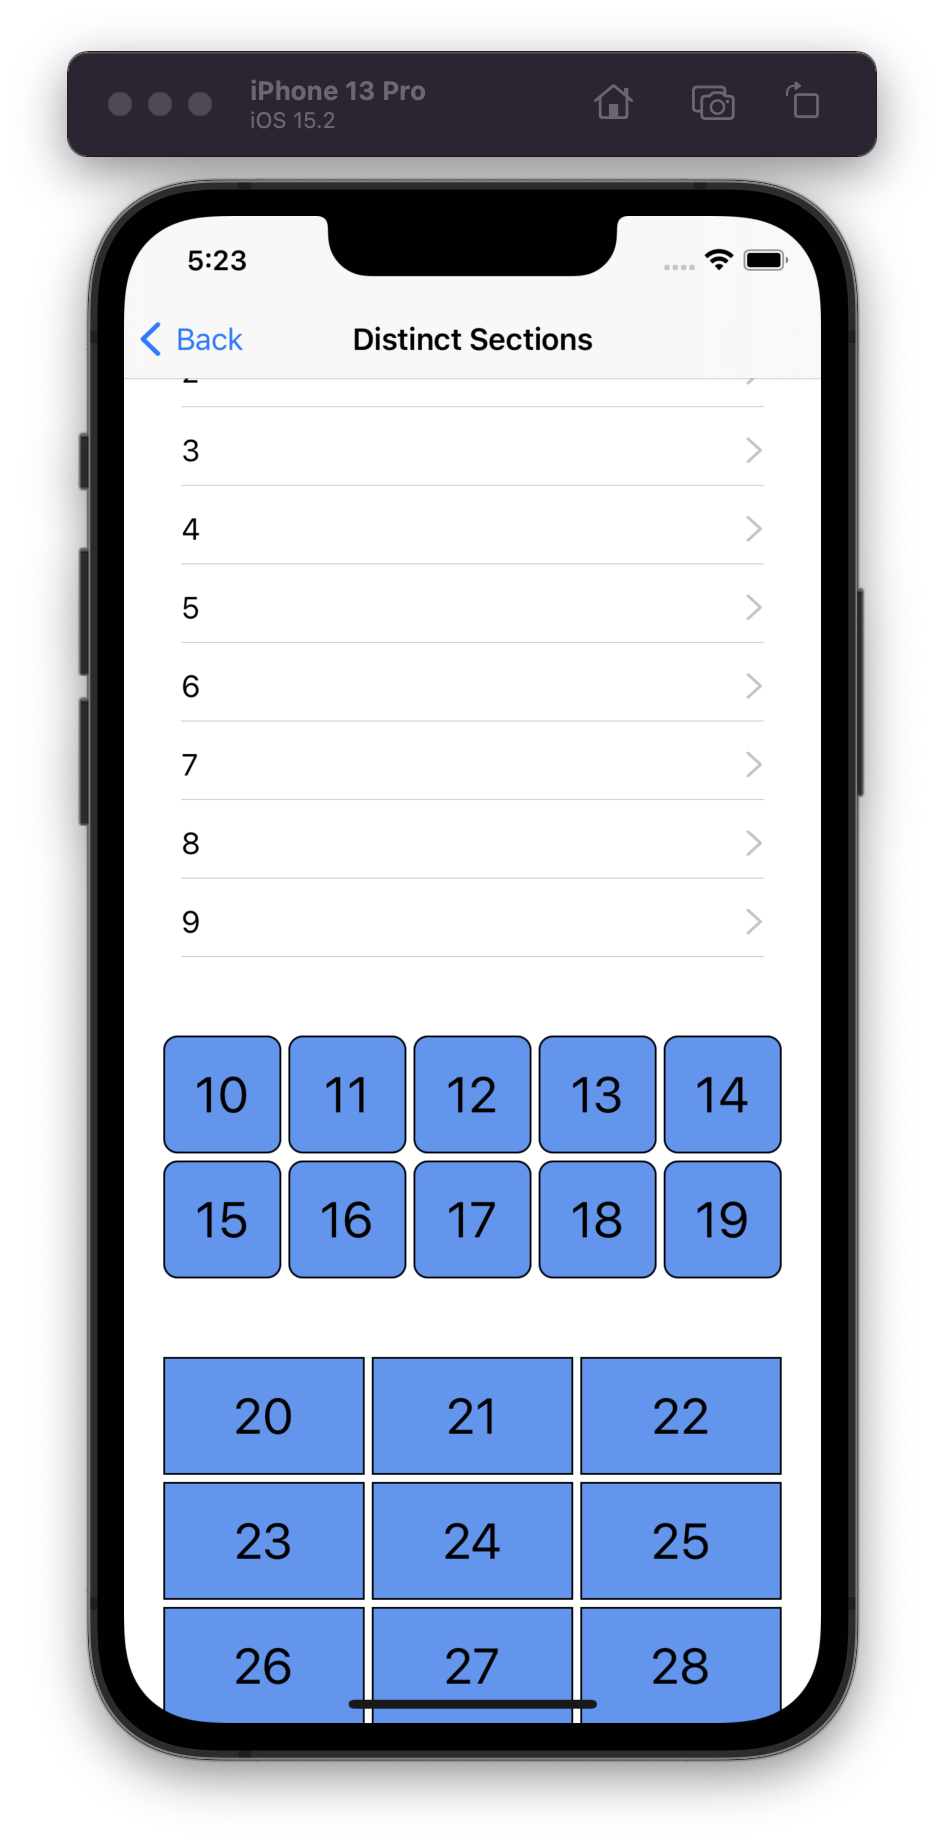
Display Distinct Layouts Per Section
enum SectionLayoutKind: Int, CaseIterable {
    case list, grid5, grid3
    var columnCount: Int {
        switch self {
        case .grid3:
            return 3

        case .grid5:
            return 5

        case .list:
            return 1
        }
    }
}

func createLayout() -> UICollectionViewLayout {
    let layout = UICollectionViewCompositionalLayout { (sectionIndex: Int,
        layoutEnvironment: NSCollectionLayoutEnvironment) -> NSCollectionLayoutSection? in

        guard let sectionLayoutKind = SectionLayoutKind(rawValue: sectionIndex) else { return nil }
        let columns = sectionLayoutKind.columnCount

        // The group auto-calculates the actual item width to make
        // the requested number of columns fit, so this widthDimension is ignored.
        let itemSize = NSCollectionLayoutSize(widthDimension: .fractionalWidth(1.0),
                                             heightDimension: .fractionalHeight(1.0))
        let item = NSCollectionLayoutItem(layoutSize: itemSize)
        item.contentInsets = NSDirectionalEdgeInsets(top: 2, leading: 2, bottom: 2, trailing: 2)

        let groupHeight = columns == 1 ?
            NSCollectionLayoutDimension.absolute(44) :
            NSCollectionLayoutDimension.fractionalWidth(0.2)
        let groupSize = NSCollectionLayoutSize(widthDimension: .fractionalWidth(1.0),
                                              heightDimension: groupHeight)
        let group = NSCollectionLayoutGroup.horizontal(layoutSize: groupSize, subitem: item, count: columns)

        let section = NSCollectionLayoutSection(group: group)
        section.contentInsets = NSDirectionalEdgeInsets(top: 20, leading: 20, bottom: 20, trailing: 20)
        return section
    }
    return layout
}
해당 예제는 하나의 collection view layout에서 각 section들이 다른 레이아웃 배치를 가지는 것을 보여준다. 각 section의 특징을 담은 SectionLayoutKind enum을 추가해서 이를 활용한다. 이에 대한 접근은 sectionIndex 파라미터를 통해 이루어진다. 그리고 columnCount를 통해 colums값을 가져온다. columns값은 sectionIndex에 따라 다르게 가져오기 때문에 아래 코드에서도 다른 레이아웃 배치가 가능해진다.
cf. NSCollectionLayoutEnvironment: 해당 container 및 환경적 특징에 대한 정보를 얻을 수 있는 객체
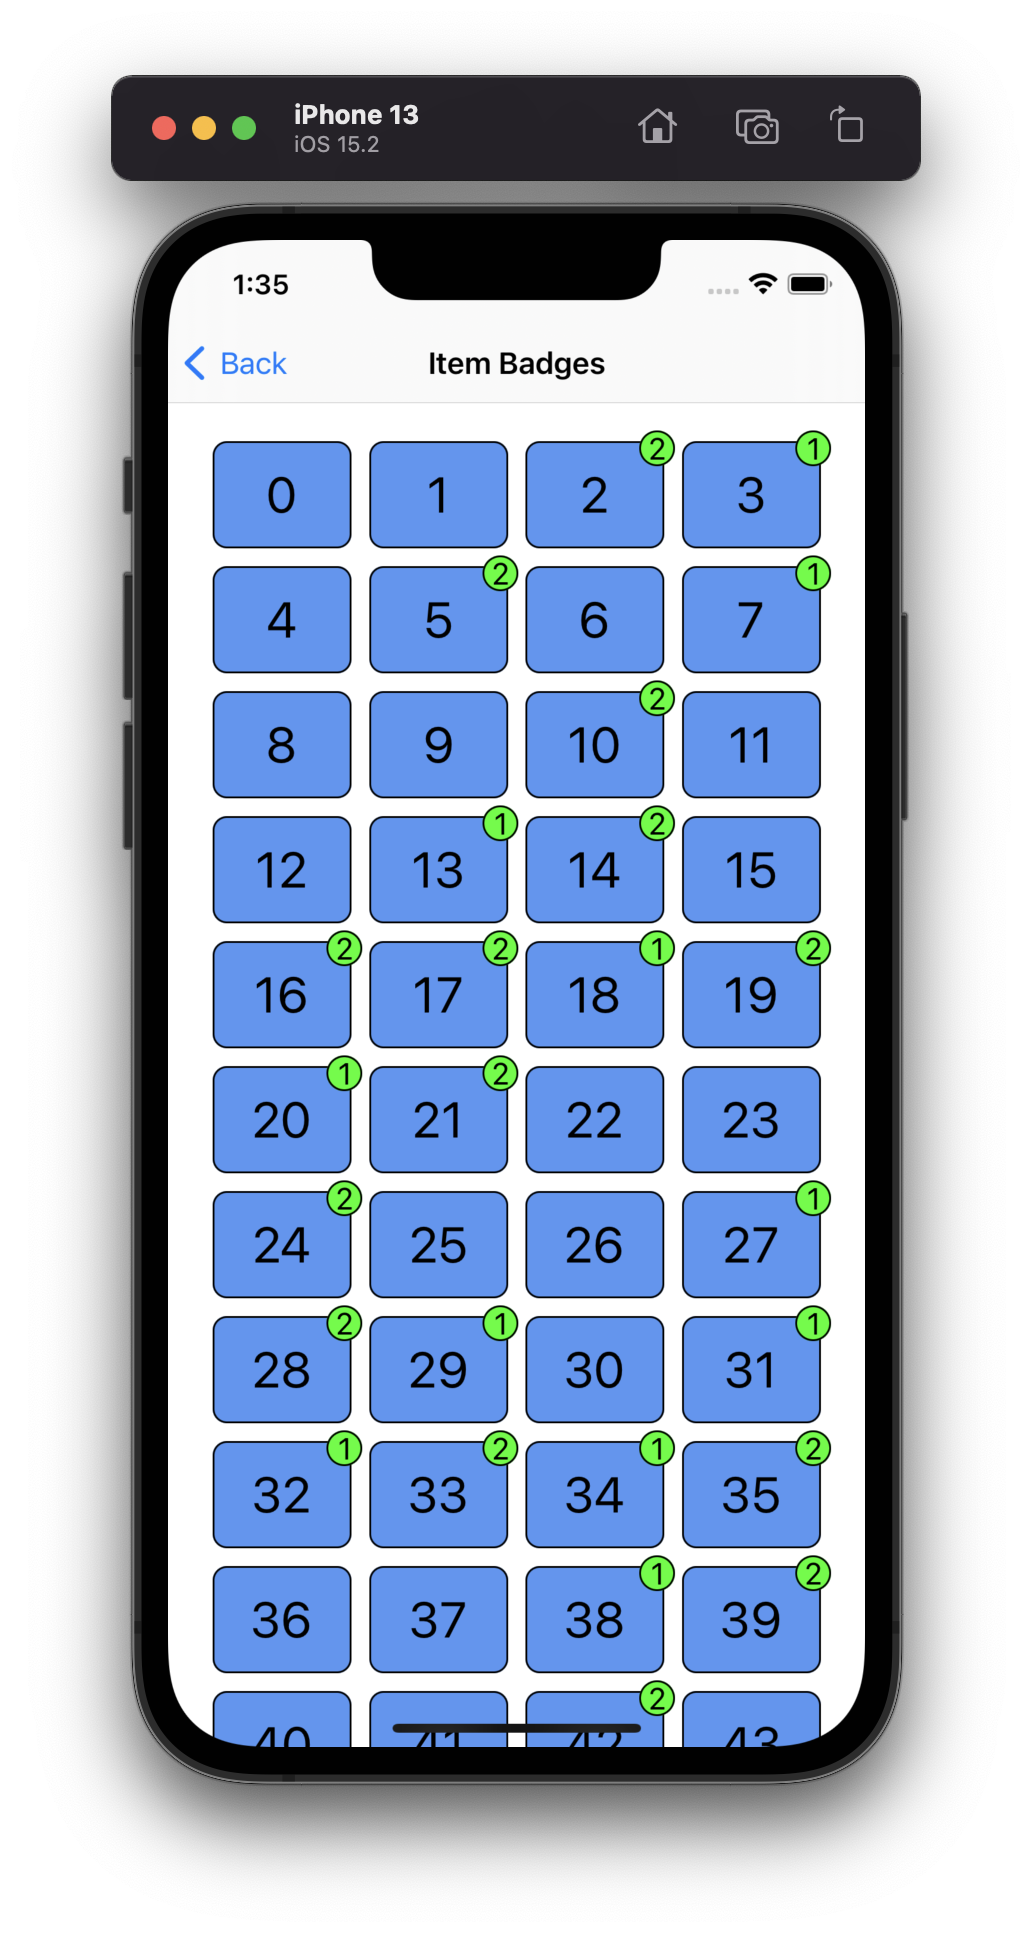
Add Badges to Items
let badgeAnchor = NSCollectionLayoutAnchor(edges: [.top, .trailing], fractionalOffset: CGPoint(x: 0.3, y: -0.3))
let badgeSize = NSCollectionLayoutSize(widthDimension: .absolute(20),
                                      heightDimension: .absolute(20))
let badge = NSCollectionLayoutSupplementaryItem(
    layoutSize: badgeSize,
    elementKind: BadgeSupplementaryView.reuseIdentifier,
    containerAnchor: badgeAnchor)

let itemSize = NSCollectionLayoutSize(widthDimension: .fractionalWidth(0.25),
                                     heightDimension: .fractionalHeight(1.0))
let item = NSCollectionLayoutItem(layoutSize: itemSize, supplementaryItems: [badge])
item.contentInsets = NSDirectionalEdgeInsets(top: 5, leading: 5, bottom: 5, trailing: 5)
해당 예제는 collection view의 item들에 badge같은 형태의 추가적인 view(supplementaryItem)를 어떻게 넣을 수 있는지 보여준다. 예제에서는 각 item의 오른쪽 상단 코너에 badge를 생성한다. compositional layout의 item을 생성할 때 supplementaryItems을 추가해줘서 기본적인 레이아웃 정보를 설정할 수 있다. 이 때 elementKind는 String 형태로 아래의 supplementaryRegistration 생성자의 elementKind와 맞춰주어야함에 유의하자. (애플 예제에서는 의도한것인지 모르겠지만 이 둘이 맞지 않아 에러가 난다.)
cf. NSCollectionLayoutAnchor: supplementary item을 item에 어떻게 추가할지 결정하는 객체.
let supplementaryRegistration = UICollectionView.SupplementaryRegistration
<BadgeSupplementaryView>(elementKind: BadgeSupplementaryView.reuseIdentifier) {
    (badgeView, string, indexPath) in
    guard let model = self.dataSource.itemIdentifier(for: indexPath) else { return }
    let hasBadgeCount = model.badgeCount > 0
    // Set the badge count as its label (and hide the view if the badge count is zero).
    badgeView.label.text = "\(model.badgeCount)"
    badgeView.isHidden = !hasBadgeCount
}
supplementaryRegistration을 생성해서 dataSource의 supplementaryViewProvider에 넣어주어야 작업이 마무리된다. 예제에서는 BadgeSupplementaryView라는 UICollectionReusableView를 상속받는 View를 만들어 직접 활용했다.
dataSource.supplementaryViewProvider = {
    return self.collectionView.dequeueConfiguredReusableSupplementary(using: supplementaryRegistration, for: $2)
}
마지막으로 supplementaryViewProvider에서 dequeueConfiguredReusableSupplementary를 넘겨준다. supplementaryViewProvider의 클로저가 (_ collectionView: UICollectionView, _ elementKind: String, _ indexPath: IndexPath) 라는 파라미터를 제공하기 때문에 이 중 IndexPath를 활용하기 위해 $2를 사용한 것이다.
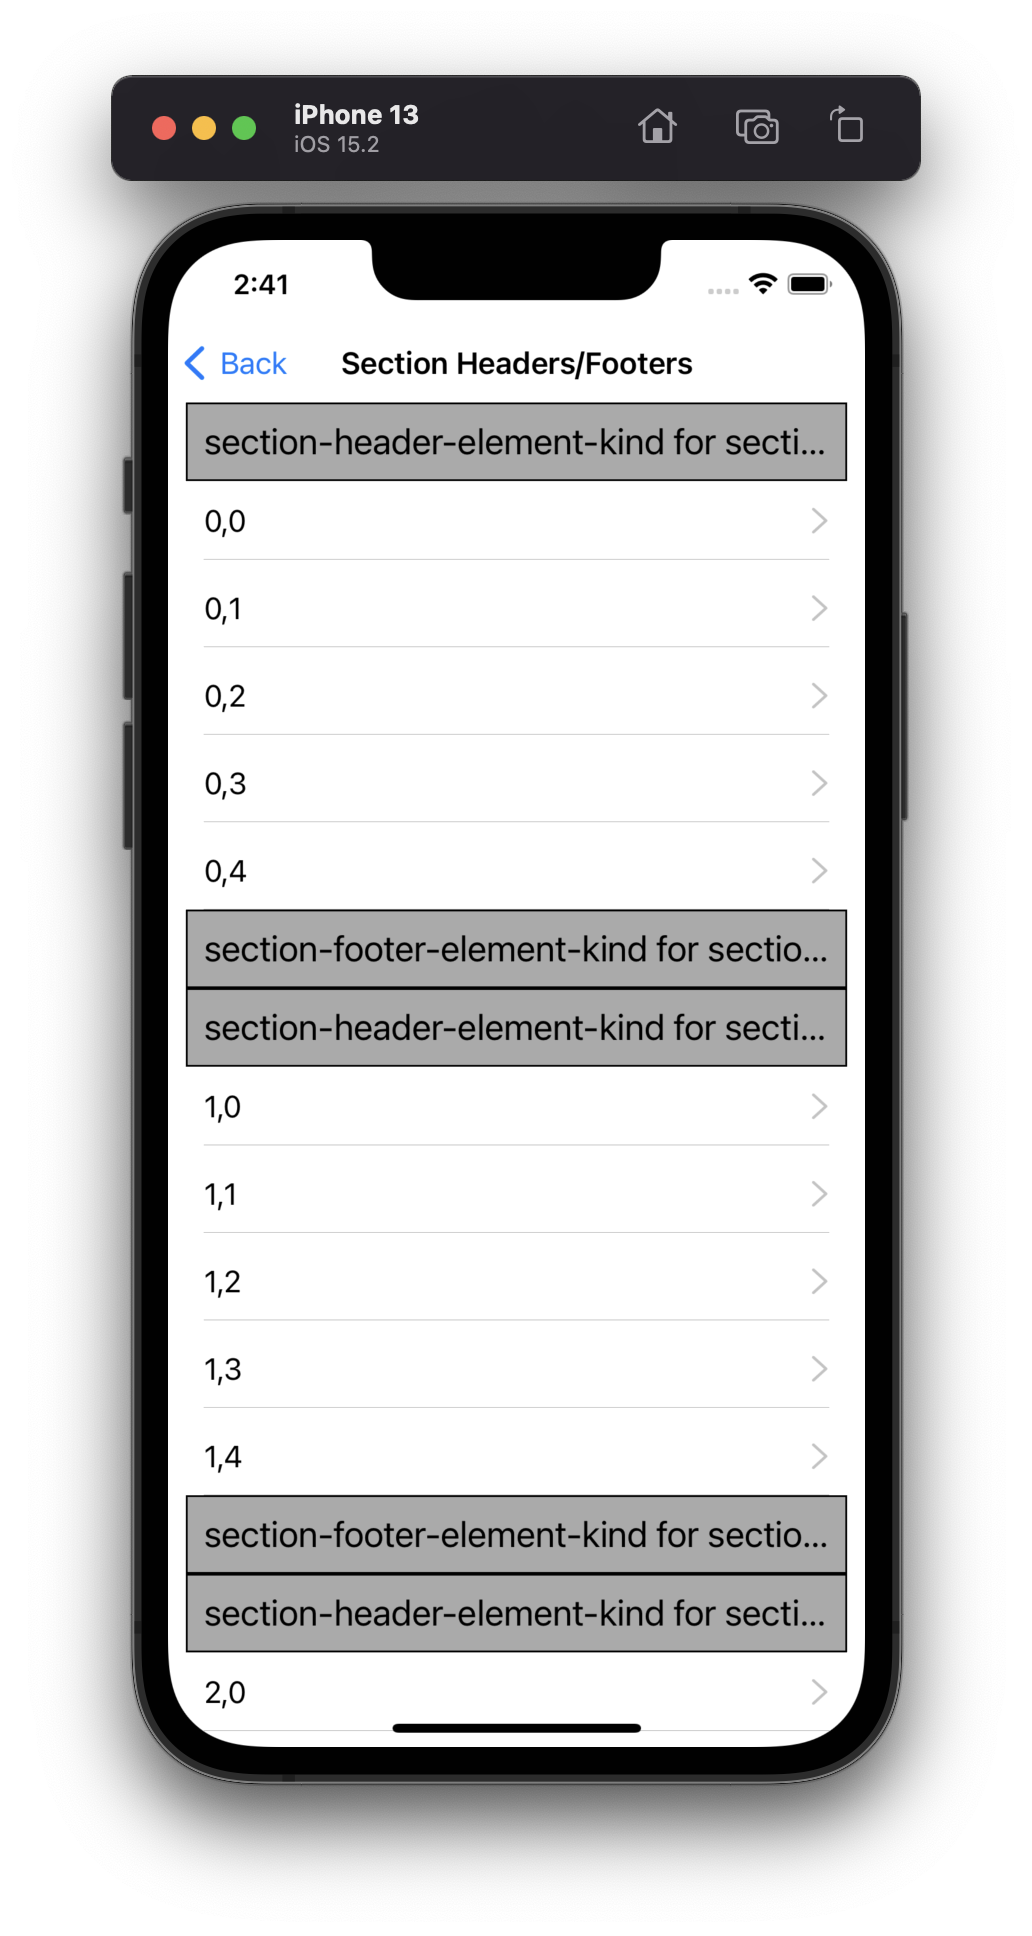
Add Headers and Footers to Sections
let headerFooterSize = NSCollectionLayoutSize(widthDimension: .fractionalWidth(1.0),
                                             heightDimension: .estimated(44))
let sectionHeader = NSCollectionLayoutBoundarySupplementaryItem(
    layoutSize: headerFooterSize,
    elementKind: SectionHeadersFootersViewController.sectionHeaderElementKind, alignment: .top)
let sectionFooter = NSCollectionLayoutBoundarySupplementaryItem(
    layoutSize: headerFooterSize,
    elementKind: SectionHeadersFootersViewController.sectionFooterElementKind, alignment: .bottom)
section.boundarySupplementaryItems = [sectionHeader, sectionFooter]
이번 예제에서는 각 section에 header와 footer를 추가하는 방법을 알 수 있다. 먼저 NSCollectionLayoutBoundarySupplementaryItem을 통해 각 header와 footer의 레이아웃 정보를 생성한다. 그리고 section에 boundarySupplementaryItems에 추가한다. (cf. SectionHeadersFootersViewController는 예제에서 만든 ViewController임.)
let headerRegistration = UICollectionView.SupplementaryRegistration
<TitleSupplementaryView>(elementKind: SectionHeadersFootersViewController.sectionHeaderElementKind) {
    (supplementaryView, string, indexPath) in
    supplementaryView.label.text = "\(string) for section \(indexPath.section)"
    supplementaryView.backgroundColor = .lightGray
    supplementaryView.layer.borderColor = UIColor.black.cgColor
    supplementaryView.layer.borderWidth = 1.0
}

let footerRegistration = UICollectionView.SupplementaryRegistration
<TitleSupplementaryView>(elementKind: SectionHeadersFootersViewController.sectionFooterElementKind) {
    (supplementaryView, string, indexPath) in
    supplementaryView.label.text = "\(string) for section \(indexPath.section)"
    supplementaryView.backgroundColor = .lightGray
    supplementaryView.layer.borderColor = UIColor.black.cgColor
    supplementaryView.layer.borderWidth = 1.0
}
SupplementaryRegistration을 통해 headerRegistration, footerRegistration을 각각 생성해준다. (cf. TitleSupplementaryView는 예제에서 만든 View임.)
dataSource.supplementaryViewProvider = { (view, kind, index) in
    return self.collectionView.dequeueConfiguredReusableSupplementary(
        using: kind == SectionHeadersFootersViewController.sectionHeaderElementKind ? headerRegistration : footerRegistration, for: index)
}
최종적으로는 dataSource에서 supplementaryViewProvider를 적용해준다.
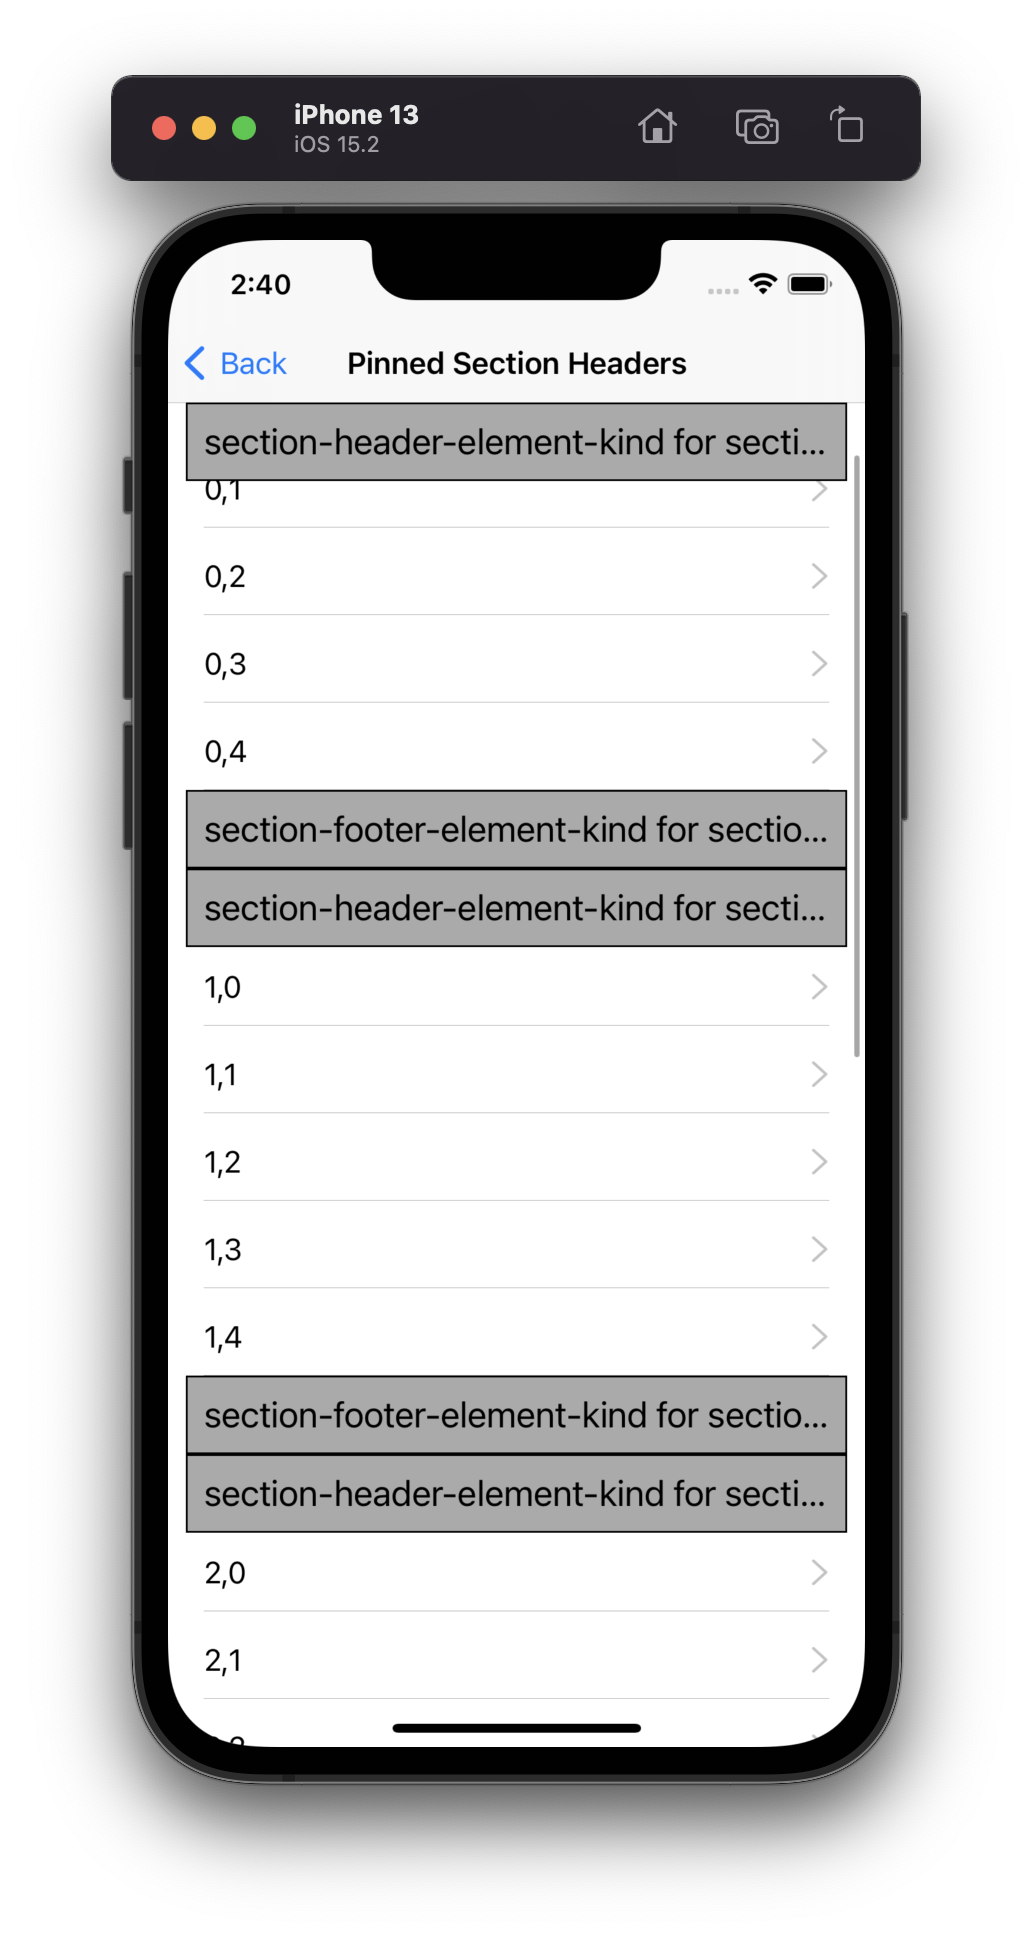
Pin Section Headers to Sections
let sectionHeader = NSCollectionLayoutBoundarySupplementaryItem(
    layoutSize: NSCollectionLayoutSize(widthDimension: .fractionalWidth(1.0),
                                      heightDimension: .estimated(44)),
    elementKind: PinnedSectionHeaderFooterViewController.sectionHeaderElementKind,
    alignment: .top)
let sectionFooter = NSCollectionLayoutBoundarySupplementaryItem(
    layoutSize: NSCollectionLayoutSize(widthDimension: .fractionalWidth(1.0),
                                      heightDimension: .estimated(44)),
    elementKind: PinnedSectionHeaderFooterViewController.sectionFooterElementKind,
    alignment: .bottom)
sectionHeader.pinToVisibleBounds = true
sectionHeader.zIndex = 2
section.boundarySupplementaryItems = [sectionHeader, sectionFooter]
해당 예제에서는 생성한 header와 footer를 어떻게 고정하는지 알 수 있다. 이를 활용하면 section의 어느곳으로 스크롤을 해도 header(footer)가 고정된다. 먼저 원하는 NSCollectionLayoutBoundarySupplementaryItem의 pinToVisibleBounds를 true로 설정해주고 zIndex를 1보다 크게 설정해준다. zIndex는 해당 section에서의 상대적 위치를 나타내는 값이다. 나머지 과정은 Add Headers and Footers to Sections 예제와 크게 차이가 없어 생략한다.
한번에 끝내기엔 양이 너무 많네요... 2편(https://inuplace.tistory.com/1042)에 이어서 정리!!
'🍎 Apple > UIKit' 카테고리의 다른 글
| [UIKit] ViewController Life Cycle (0) | 2022.02.12 |
|---|---|
| [UIKit] Multiple Gesture Recognizer 처리하기 (0) | 2022.02.05 |
| [UIKit] Compositional Layout Example from Apple Sample Code (2) (0) | 2022.01.18 |
| [UIKit] Frame vs Bounds (0) | 2021.11.10 |
| [UIKit] Diffable Datasource (0) | 2021.10.20 |